What testing or validation steps should be taken after replacing ferrite beads with inductors in a circuit?
Testing and Verification Steps Required After Replacing a Ferrite Bead with an Inductor in a Circuit
When replacing a ferrite bead in a circuit with an inductor, thorough testing and verification are critical to ensure that the circuit operates correctly and reliably.
Here are the recommended steps:
1. Visual inspection:
First, visually inspect the replaced inductor to ensure that there is no obvious surface damage, scratches, cracks, etc. Also check if there are any impurities or contaminants attached to the surface of the inductor.
Check connections: Make sure all solder joints are secure and there are no cold solder joints.
Component placement: Verify that the inductor is oriented correctly and is securely placed.
2. DC resistance test:
Use the ohmmeter of a multimeter to measure the DC resistance of the wire.
If the resistance value is infinite, there is a break in the coil (or between the leads); if the resistance value is much smaller than normal, there is a partial short circuit; if the resistance value is zero, the coil is completely shorted.
This step is to ensure that the electrical connection of the inductor is normal and there are no breaks or short circuits.
The following needs to be checked during the initial power-on test;
Voltage check: Before powering up the entire circuit, use a multimeter to check the voltage levels at various points. Make sure they are within the expected range.
Current draw: Measure the current draw and compare it to the expected value to avoid overload.
3. Check whether there is a short circuit between the coil and the shield:
For inductor coils with metal shields, you also need to check whether there is a short circuit between the coil and the shield.
This is to ensure that the performance of the inductor is not affected by the shield and to ensure that it works properly.
We need to test signal integrity;
Oscilloscope test: Use an oscilloscope to check the signal integrity of various points in the circuit. Look for noise, faults, or unexpected waveform distortion.
Frequency response: Verify that the frequency response of the circuit remains within the required range.
4. Thermal Analysis
Heating: Monitor the inductor and surrounding components for any abnormal heating using a thermal imager or careful touch (if safe).
Cooling: Ensure that the inductor does not cause nearby components to overheat.
5. Noise and EMI Testing
EMI Radiation: Measure electromagnetic interference using an EMI tester. Replacing the ferrite bead with an inductor will affect the EMI characteristics.
Audio Testing: If the circuit involves audio, check if the inductor introduces any noise or hum.
6. Functional Testing
End-to-End Testing: Perform a complete end-to-end functional test of the circuit. This includes simulating the operating environment.
Edge Cases: Test any edge cases or stress conditions to ensure reliability.
7. Documentation and Comparison
Data Logging: Document all findings, including voltage, current, and temperature readings.
Comparison: Compare these readings to the original configuration with the ferrite bead.
Key Considerations
Compatibility: Ensure that the inductor meets the same specifications (e.g., impedance at a specific frequency) as the ferrite bead it replaces.
Performance: Consider that inductors may introduce different performance characteristics than ferrite beads, such as Q factor and resonant frequency.
The above steps can fully verify the performance and reliability of replacing ferrite beads with inductors, ensuring that the replacement components can work properly and meet the requirements of use. Thorough testing ensures that your design is both reliable and efficient.
(★ For more information on ferrite beads, see this article: • How Do Ferrite Beads Work? | We Understand From The Selection And Application Of Ferrite Beads)
What experiences do electronics hobbyists and professionals have about replacing ferrite beads with inductors?
If you are diving into the world of electronics, you may wonder about the feasibility of replacing ferrite beads with inductors in your circuits. Hobbyists and professionals have different experiences and insights on this topic, highlighting both practicalities and pitfalls.
Before diving into the experience, it is important to understand the main functions of ferrite beads and inductors:
Ferrite beads: Mainly used to filter high-frequency noise.
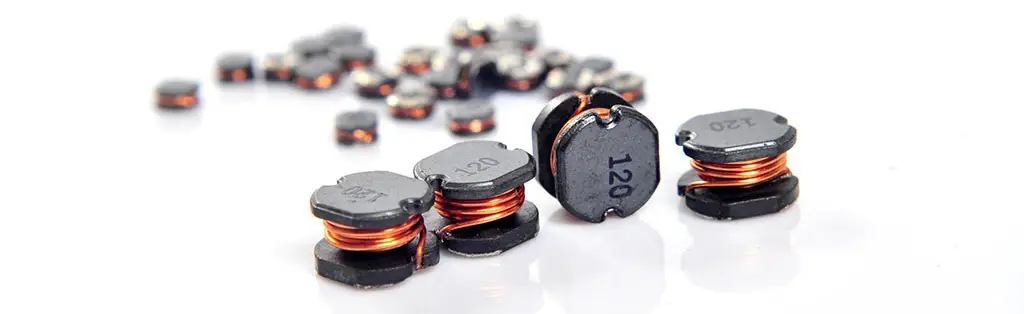
Inductors: Usually used to store energy and filter lower frequencies.
Here are some practical experiences of users in various fields;
In terms of noise suppression:
Electronic hobbyists often try to replace ferrite beads with inductors to solve noise problems in circuits. Experienced engineer John D. pointed out that while inductors can sometimes filter out certain frequencies, they are not always as effective as ferrite beads in high-frequency noise suppression. He emphasized that the specific environment and requirements of the circuit play a crucial role.
In terms of circuit performance:
Another professional, Anna W., shared that she has successfully used inductors instead of ferrite beads for low-frequency applications. However, she warned that resonance issues may occur. Inductors add unwanted resonances in the circuit, which may cause instability.
In terms of cost and availability:
One of the significant advantages of using inductors over ferrite beads is cost. Many forum members have found inductors to be more readily available and often less expensive. James L. mentioned that inductors offer a viable alternative for non-critical applications in areas where specialized components are more difficult to obtain.
In terms of component selection:
Evelyn M. noted the importance of proper component selection. Not all inductors are effective replacements for ferrite beads. She shared an example of using a poorly selected inductor that resulted in degraded project performance. It is critical to ensure that specifications are met.
Conclusion
Replacing ferrite beads with inductors in electronic circuits is feasible, but it depends greatly on the specific application and the frequencies involved. Insights from both hobbyists and professionals emphasize the importance of thorough testing and careful component selection to achieve the desired results. Always consider the function and environment of the circuit to make an informed decision.